Hardwood Floor Staining in Vancouver, WA: Process, Timeline and Pitfalls
September 28, 2026 · All About Floors NW
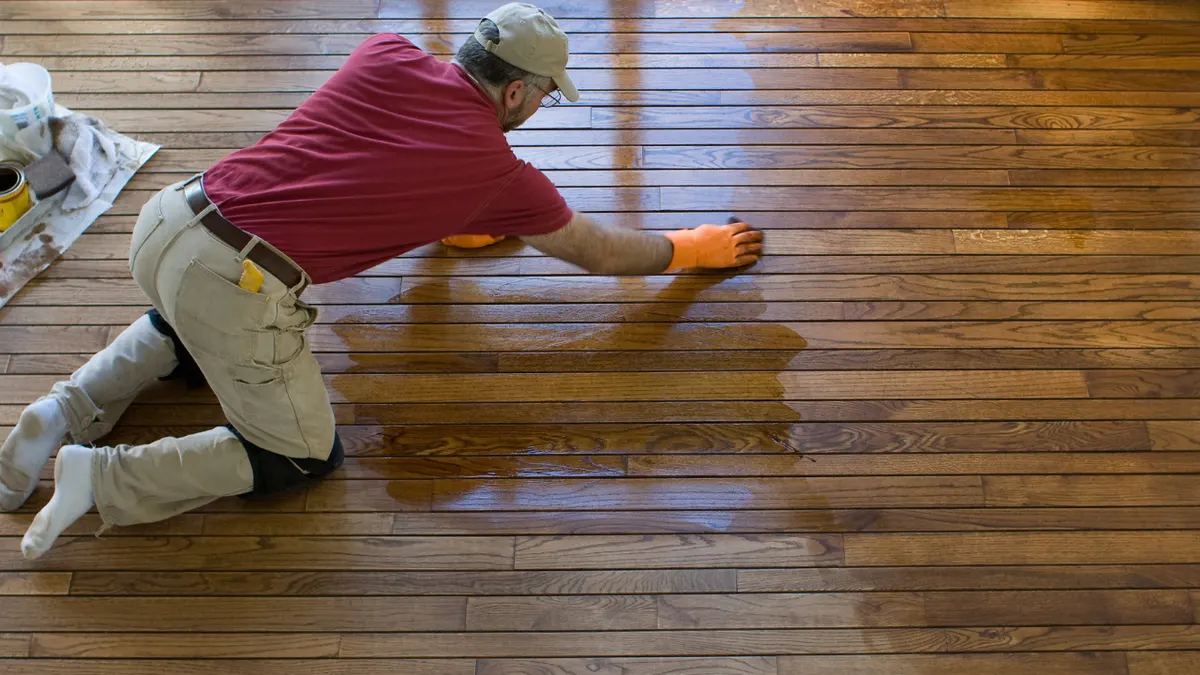
Search “hardwood floor staining” and most of what comes up is about choosing a color. Color matters, and we have a whole guide to choosing warm stain colors for Vancouver homes. But most stain jobs that go wrong have nothing to do with the color someone picked. The color was fine. The sanding was uneven, the floor was not clean, the stain sat too long, or a finish went on before the stain was dry.
This guide covers the work itself: what professional hardwood floor staining involves, how long it takes in a Vancouver, WA house, what to expect on each day, and how to spot a shortcut before it ends up permanently in your floor.
Staining is part of refinishing, not a separate job
Stain only works on bare wood. It soaks into the open pores of the top layer of the board, and anything already on the surface, such as old polyurethane, wax or a previous stain’s topcoat, stops it from getting there.
So staining a floor that already has a finish is really a hardwood refinishing project: sand to raw wood, stain, then seal with two or three coats of finish. There is no shortcut that gives the same result. Tinted “no-sand” products and gel stains brushed over an existing finish are colored topcoats. They sit on the surface, look fine for a while, and wear through in the kitchen and down the hallway first, which is exactly where you look most.
The exception is a brand-new unfinished hardwood floor. It still gets sanded flat after installation, but it goes straight to staining without a finish to remove. If you are choosing between new unfinished and prefinished boards, our guide to hardwood floor installation in Vancouver covers that decision.
Step 1: The sanding decides the color
The most important part of a stain job happens before anyone opens a can of stain.
A drum or belt sander takes the floor down to fresh wood in stages, moving from coarse grit to fine. An edger handles the perimeter the big machine cannot reach, and corners and toe-kicks are scraped or detail-sanded by hand. Then the whole floor is usually screened with a buffer to blend the field and the edges into one consistent surface.
Stain shows every difference in that surface:
- Sander chatter and drum marks that you cannot see on bare wood turn into visible ripples once the stain goes on.
- Edges sanded more coarsely than the middle of the room take more stain and show up as a darker frame around the floor.
- Swirl marks from the edger fill with pigment and show up as small dark circles along the baseboards.
- Patches of old finish left in low spots refuse the stain and stay light.
A clear, unstained floor forgives most of this. A medium or dark stain forgives none of it. The darker the color you want, the cleaner the sanding has to be, and that is the main reason a stained floor costs more labor than a natural one.
Step 2: Water popping, when it is worth it
Water popping means wetting the freshly sanded floor evenly with clean water and letting it dry before staining. The water raises the grain and opens the pores, so the wood takes more stain and the color comes out deeper and more even.
It helps in two situations:
- Darker stains, where you want a rich, even color instead of a thin wash.
- Tight-grained woods like maple, which otherwise take stain unevenly and blotch.
It is not always the right call. Popping makes the wood absorb more stain, so a light stain can end up darker than the sample, and any unevenness in the wetting shows up in the color. It also adds drying time, which matters in a Vancouver winter. We decide whether to pop the grain during the sample stage, on your boards, rather than as a blanket rule.
Step 3: Samples on your floor, in your light
A stain chip in a showroom tells you very little. The same stain looks different on red oak, white oak, maple and hickory, it changes again under an oil-based or water-based finish, and it reads cooler under our gray Pacific Northwest daylight than under store lighting.
So after sanding, we apply two or three candidate colors side by side on your actual floor, usually in a spot that gets typical light. We let them dry, and where it matters we seal part of each sample with the finish you have chosen, because the topcoat shifts the color too. You look at them at different times of day and sign off before the whole room gets stained.
Our stain color guide explains why species and light change the result so much. The short version: approve the sample on your own floor, and look at it on a cloudy afternoon as well as a sunny one.
Step 4: Applying the stain
Stain goes on in manageable sections, working with the grain, and the excess is wiped off within the working time the manufacturer allows. Leaving it too long before wiping is what causes sticky, uneven patches, and on a big room that is a real risk for one person working alone. On larger floors we stain with two people, one applying and one wiping, so the whole room stays even.
The other rule is keeping a wet edge. Stain that overlaps an area that has already started to dry leaves lap marks. That is why a stain job is planned room by room, working out of a doorway, with a clear route so nobody ends up stranded in a corner.
Step 5: Letting it dry, which takes longer here
The stain has to be fully dry before the first coat of finish goes on. Put polyurethane over damp stain and you get a finish that will not cure properly, or that peels later.
Drying time depends on the product, the temperature and the humidity, and Vancouver’s climate works against it for much of the year. A cool, damp November day can double the dry time printed on the can. We control what we can: running the home’s heat, keeping air moving without blowing dust onto the floor, and checking that the stain is actually dry rather than going by the clock. On a winter job, that sometimes means finishing a day later than a summer job of the same size. That is normal and worth waiting for.
Step 6: Finish coats seal in the color
Stain gives the floor its color. The finish is what protects it. Most stained floors get two or three coats of finish, with a light buff between coats for adhesion and smoothness.
The finish you choose also affects the color. Oil-based polyurethane adds a warm amber tone that deepens over the years. Water-based finishes stay clear, so the color you approved is the color you keep. Sheen is a separate choice. A matte or satin finish hides scratches and dust far better than a glossy one, which is why most Vancouver homeowners choose them now. Our guide to matte, satin and semi-gloss hardwood sheens covers the tradeoffs.
How long hardwood floor staining takes
For a typical Vancouver home, plan on three to five days from the first pass of the sander to the final coat:
| Day | What happens |
|---|---|
| 1 | Furniture out, sanding, edging and screening |
| 2 | Clean-up, optional water popping, stain samples, then staining once you approve a color |
| 3 | Stain dries; first coat of finish if it is fully dry |
| 4–5 | Second and third coats of finish, with a light buff between coats |
Then the floor needs time to cure:
- 24 hours: light foot traffic, socks only
- 48–72 hours: pets back on the floor
- 5–7 days: heavy furniture back, with felt pads; rugs after the finish is fully cured
Stairs, borders, dark colors and cold weather all add time. The refinishing process guide covers how to plan around dust and living arrangements during the work.
What drives the cost of staining
Staining is priced as part of a sand-and-refinish job, so the main cost is the refinishing itself: square footage, how many rooms, the condition of the floor, and the number of finish coats. Staining adds to that for a few reasons:
- Finer sanding and extra screening to get a surface that takes stain evenly
- Water popping for dark colors or maple
- Sample boards and the time it takes to approve a color
- An extra day of drying before the finish goes on
- Custom-mixed colors, when a stock stain does not match existing trim or an adjoining floor
What usually costs more later is a cheap stain job. Blotches, lap marks and sander chatter are sealed under the finish, and fixing them means sanding the whole floor again. Ask any contractor you are comparing how they sand, whether they sample on your floor, and how they check that the stain is dry before the finish goes on. Our guide to hiring a flooring contractor in Vancouver has a fuller list of questions.
Is your floor a candidate for a new color?
Most solid hardwood in Clark County homes can be sanded and restained, often several times over its life. Before we quote, we check a few things:
- Wear layer thickness. Solid hardwood usually has plenty. Engineered hardwood needs roughly 3 mm or more of real wood on top to sand safely.
- Previous refinishing. Floors that have been sanded several times may have exposed nail heads or tongues, which limits how aggressively they can be sanded.
- Species. Red oak, white oak and hickory take stain well. Maple, birch and some exotic species are harder, and a few will not take a dark color evenly at all.
- Damage. Deep pet stains and water damage that has turned the wood black usually go deeper than sanding reaches. Those boards get replaced and woven in before staining, so the whole floor takes the color together.
If you are not sure whether the floor is worth saving, start with refinish or replace: how to tell if your hardwood is worth saving.
Matching new stain to existing floors and trim
A common request is making one room match another. Examples include a new addition next to an original oak floor, a patched area after a wall was removed, or a floor that has to sit next to existing stair treads.
We do this by mixing stains and testing on sample boards and in inconspicuous areas until the color matches under the same finish. Wood from different eras rarely matches perfectly, because older oak has aged and new boards are brighter, so the aim is a match you cannot pick out from standing height. Often the cleanest answer is to sand and stain the connected rooms together so they finish as one floor.
Hardwood floor staining from All About Floors NW
We have been sanding, staining and finishing hardwood in Clark County since 1999. Our showroom is at 6700 NE 152nd Ave #140 in east Vancouver’s 98682, and our crews stain floors throughout Vancouver, Camas, Washougal, Salmon Creek, Hazel Dell, Battle Ground and the rest of our service areas.
Every staining job includes:
- A free in-home estimate, where we check species and wear layer and talk through color
- Stain samples on your actual floor before the room is stained, plus custom color mixing when a stock stain will not match
- Dust-controlled sanding and a written scope that lists coats, finish type and sheen
- Our workmanship warranty
Book a free in-home estimate, or text us at (360) 525-2962 with a couple of photos of the floor and the color you have in mind. We will tell you honestly whether it is achievable on your wood.
Related reading
Frequently asked questions
- Can you stain hardwood floors without sanding them?
- Not properly. Stain has to soak into bare wood, and any finish left on the surface blocks it, so the color comes out patchy. Changing the color of a hardwood floor means sanding it back to raw wood first. Products sold as no-sand stains are tinted topcoats. They sit on the surface and wear through in traffic lanes.
- How long does it take to stain hardwood floors?
- For most homes the whole job takes three to five days: a day or so of sanding, a day to stain and let it dry, and then two or three coats of finish with drying time between them. Dark stains and water popping add time, and so does a cold, damp week. In Vancouver in winter we plan an extra day rather than rush a coat that has not dried.
- When can I walk on newly stained hardwood floors?
- Stain alone is never walked on, because it is not a protective layer. Once the finish is on, socks-only light traffic is usually fine after about 24 hours. Keep pets off for 48 to 72 hours, and wait five to seven days before moving heavy furniture back or putting down rugs, while the finish fully cures.
- Can light hardwood floors be stained darker, or dark floors made lighter?
- Going darker is straightforward after a full sand. Going lighter is possible only if the old stain sands out completely, which it usually does on solid hardwood because the stain sits in the top layer of the wood. The limit is the species. Red oak will always carry some pink, and maple resists dark stain. We test on your floor before committing.
- Can engineered hardwood be stained?
- If the wear layer is thick enough to sand, yes. As a rough guide, a wear layer of about 3 mm or more can usually take a sand and restain. Thin-veneer engineered floors cannot, and many prefinished engineered floors have a factory finish that is harder to sand evenly. We check the wear layer at a floor register or a threshold during the estimate.
- Why does my stain look blotchy?
- Usually one of four things: uneven sanding, where sander marks or unsanded edges take stain differently; a species like maple or birch that absorbs stain unevenly by nature; old finish or wax left in the grain; or stain that was left to sit too long before wiping. Blotching is almost always something that happened before or during application, which is why the preparation matters more than the product.