Hardwood Floor Installation in Vancouver, WA: Methods, Prep and Timeline
September 14, 2026 · All About Floors NW
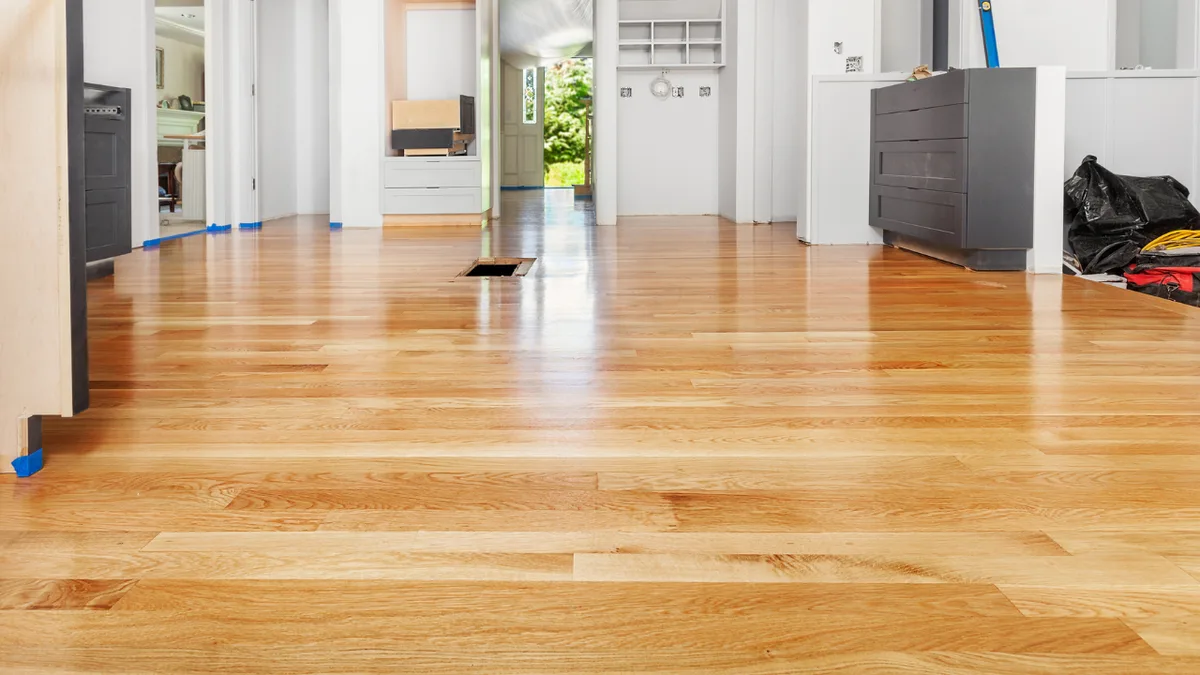
Hardwood is the floor people ask about first, and it is the one where installation matters most. Wood is a living material. It takes on moisture and gives it back, and in a climate that swings from saturated in January to dry heated air indoors, a hardwood floor installed without accounting for that will cup, gap or squeak within a couple of years, no matter how good the boards were.
This guide covers what a proper hardwood installation involves in a Vancouver, WA home: which method suits your subfloor, what gets measured before a single board goes down, and what a realistic timeline looks like. For choosing the wood itself, start with our guide to hardwood species and finishes.
Three ways hardwood goes down
Nail-down. Boards are blind-nailed or stapled through the tongue into a plywood or OSB subfloor. It is the traditional method, and it is how most solid 3/4-inch hardwood is installed. It needs a sound wood subfloor thick enough to hold fasteners.
Glue-down. Boards are set into a trowelled adhesive. This is the standard method for engineered hardwood over a concrete slab, and it is also used for wide-plank and patterned floors like herringbone, where every board needs to stay exactly where it was set. Many flooring adhesives double as a moisture barrier, which matters over concrete.
Floating. Certain engineered products lock or glue together at the edges and sit on an underlayment without being fastened down. It is the most forgiving of what is underneath and the fastest to install, but it can feel and sound slightly less solid underfoot than a fastened floor.
The subfloor chooses the method more often than the homeowner does. Our engineered vs. solid hardwood guide explains why that decision usually comes first.
Moisture: what gets measured before anything goes down
This is the part of a hardwood install that separates a floor that lasts from one that fails, and it is invisible once the job is finished.
The subfloor. Moisture meter readings on the plywood or OSB, taken in several spots. A damp subfloor, usually fed by a crawlspace, is the most common reason new hardwood cups.
The flooring. Readings on the boards themselves once they are in the house. The National Wood Flooring Association guideline is a difference of no more than 4 percent between strip flooring (under 3 inches wide) and the subfloor, and no more than 2 percent for planks 3 inches or wider. Wide planks move more across their width, so the tolerance is tighter.
Concrete. Slabs release moisture for years. A slab gets tested before engineered hardwood is glued or floated over it, and the result decides whether a moisture barrier or a moisture-control adhesive is needed.
That is why “let it acclimate for three days” is not a real specification. Acclimation is finished when the readings line up, not when a date on the calendar passes. In a Vancouver winter, wood delivered from a cold warehouse into a heated house can take longer than people expect.
Crawlspaces and slabs: the Clark County specifics
A large share of Vancouver homes sit on a crawlspace, and a crawlspace in this climate is a moisture source directly under the floor.
Before hardwood goes over one, we want to see the ground covered with a vapor retarder (NWFA guidelines call for at least 6-mil polyethylene over the entire crawlspace floor), working ventilation, and no standing water after a wet week. If the crawlspace is wet, fixing that comes first. A floor installed over a damp crawlspace will cup, and no product warranty covers it.
Slab-on-grade homes and basements have the opposite problem: there is no wood subfloor to nail into, and the slab itself is the moisture source. Solid hardwood is the wrong product there. Engineered hardwood, glued or floated over a tested slab, is the right one. Where a basement has a history of water, we will tell you honestly that luxury vinyl plank or tile is the better floor.
Flatness, layout and expansion space
Flat enough. For glue-down installs, NWFA guidelines call for the subfloor to be flat within 3/16 inch over 10 feet. High spots get sanded or ground down; low spots get filled. Nail-down floors are a little more tolerant, but a dip under a nailed floor is exactly where squeaks come from.
Squeaks fixed while the subfloor is exposed. Loose panels get screwed down before new wood covers them. It is the only time that job is easy.
Direction. Boards usually run perpendicular to the floor joists so they bridge them rather than sag between them, and the layout is planned so the main sightline, often from the front door, runs down the length of the boards. When those two goals conflict, the subfloor sometimes needs an added layer.
Expansion space. Wood needs room to move at every wall, cabinet base and fixed object. For solid hardwood that gap is typically about the thickness of the board, or whatever the manufacturer specifies. It is hidden by baseboard or shoe molding, and it is never filled.
Prefinished or site-finished
Prefinished hardwood arrives with a factory finish already cured. It installs faster, you can walk on it right away, and there is no sanding dust or finish odor in the house. The boards usually have a small bevel along the edges.
Site-finished hardwood is installed raw, then sanded flat, stained and coated in place. You can hit any color and sheen, the surface is perfectly flat with no bevels, and the floor is sealed as one piece. It adds several days, and you are off the floor while the coats dry.
For most Vancouver homes, prefinished engineered hardwood is the practical choice. Site-finishing earns its place when you are matching an existing floor, tying new boards into old ones, or want a custom color. Our stain color guide and sheen guide cover those choices.
Stairs, transitions and tying in
Stairs are their own job. Each tread and riser is cut and fitted individually, with a matching stair nose, and it is priced per step.
Transitions to tile, carpet or vinyl are planned before installation so the heights work, including dishwasher and range clearances in a kitchen.
Tying into existing hardwood, such as extending an original oak floor into a remodeled room, means weaving new boards into the old field and sanding the whole area as one surface. Done well, you cannot see where the old floor ends. It is one of the few jobs where site-finishing is almost always the answer, and it pairs naturally with hardwood refinishing for the rest of the house.
What a hardwood installation looks like, step by step
For a typical prefinished install on a main level:
- At the estimate: rooms measured, subfloor type confirmed, moisture read, crawlspace or slab checked, stairs and transitions noted.
- Delivery: material brought into the house and checked with a meter until it is within range of the subfloor.
- Prep: furniture moved, old flooring removed and hauled away, subfloor screwed down, flattened and cleaned, underlayment laid.
- Installation: layout snapped, boards pulled from several cartons at once to blend color and grain, installed with staggered end joints.
- Finish: stair nosings, transitions, baseboard or shoe molding, cleanup and a walkthrough.
A single room is usually one to two days. A whole main level is typically three to five. Site-finished floors add sanding, stain and finish coats on top of that. Our guide to what to expect on installation day covers the parts that are the same for every material.
What drives the cost of a hardwood install
Beyond the price of the wood itself:
- Square footage plus waste, which is higher for wide plank and for patterns
- Tear-out and disposal of the existing floor
- Subfloor repair and flattening, and any crawlspace or slab moisture work
- Installation method: glue-down is more labor than nail-down
- Stairs, priced per step
- Site finishing, which adds sanding, stain and coats on top of installation
- Layout: herringbone and chevron take far longer than a straight lay
Our Vancouver flooring cost guide puts hardwood alongside the other materials, and financing is available if the timing, rather than the decision, is the obstacle.
Get a real number
A hardwood quote that was not preceded by a moisture reading and a look at the subfloor is a guess. Book a free in-home estimate and we will bring full-size samples, measure, read the subfloor, and tell you which installation method your house calls for. We install hardwood across Clark County and the Portland metro, including Camas, Battle Ground and Gresham. Browse the range on our hardwood flooring page, or call (360) 525-2962.
Related reading
Frequently asked questions
- How long does hardwood floor installation take?
- Prefinished hardwood in a typical room takes one to two days once the material has acclimated. A whole main level usually runs three to five days. Site-finished hardwood adds several more days for sanding, staining and finish coats, because each coat has to dry before the next goes on.
- Can hardwood be installed over concrete in Vancouver, WA?
- Engineered hardwood can, either glued down or floated over a moisture barrier, once the slab has been tested for moisture. Solid 3/4-inch hardwood is not the right product over a slab or below grade. For basements and slab-on-grade rooms, engineered is the hardwood to use.
- How long does hardwood need to acclimate before installation?
- There is no fixed number of days. The goal is for the flooring's moisture content to be close to the subfloor's, which is measured with a meter rather than guessed. National Wood Flooring Association guidelines call for no more than a 4 percent difference for strip flooring under 3 inches wide and 2 percent for planks 3 inches or wider.
- Is nail-down or glue-down hardwood better?
- Neither is better in general. The subfloor decides. Nail-down is the traditional method over a plywood or OSB subfloor and suits solid hardwood. Glue-down is used for engineered hardwood over concrete and for many wide-plank and herringbone floors. Floating suits certain engineered products where fastening is not practical.