Tile Installation in Vancouver, WA: Prep, Large-Format Tile and Timeline
September 14, 2026 · All About Floors NW
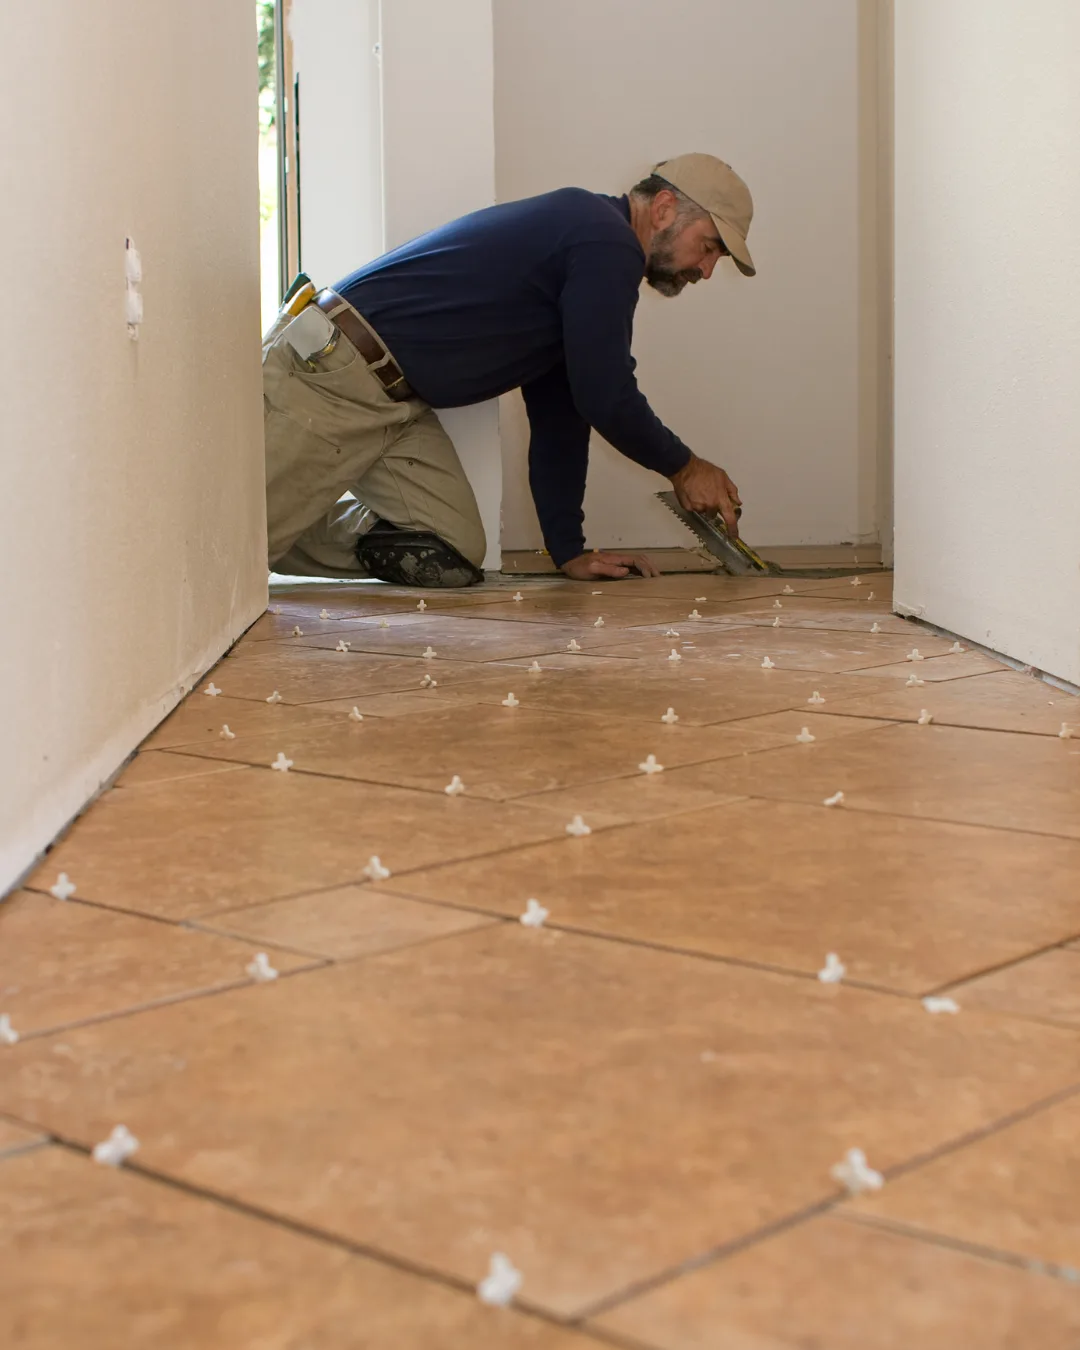
A tile floor should be the last floor that room ever needs. Porcelain does not wear out, does not care about water, and does not fade. When a tile floor fails, with cracked tiles, crumbling grout, or corners that click underfoot, it is almost never the tile. It is what happened before the tile went down.
That makes tile installation different from every other flooring type. Most of the work, and most of what you are paying for, is invisible when the job is done. This guide explains what that work is, what changes with large-format tile, and how long a tile job in a Vancouver, WA home really takes. For choosing between porcelain, ceramic and stone, start with our tile flooring guide.
The two things tile needs from a floor
Tile is rigid and grout is brittle. Neither can flex, so the floor underneath has to deliver two things.
Stiffness. A wood subfloor that gives slightly underfoot is fine under carpet and a problem under tile. The Tile Council of North America’s standard for ceramic and porcelain tile is a floor that deflects no more than L/360 (the joist span divided by 360) under load. Natural stone needs about twice that stiffness, L/720. Plenty of older Clark County homes on crawlspaces were framed with carpet in mind and need reinforcement for stone: an added layer of plywood, blocking between joists, or both.
Flatness. Tile follows the surface under it. For standard-size tile, the ANSI standard allows no more than 1/4 inch of variation over 10 feet. Large-format tile is much stricter, as covered below.
This is why a tile estimate should include someone walking the floor, feeling for bounce, and putting a straightedge on it. A price quoted from square footage alone has not accounted for the most important part of the job.
What goes between the subfloor and the tile
Depending on the room and the substrate, several layers go in that never show up in a photo of the finished floor:
- Cement backer board or a tile underlayment over a wood subfloor, fastened on the manufacturer’s schedule, to give the tile a stable surface to bond to.
- An uncoupling membrane, a mat that lets the substrate move slightly without passing that movement into the tile. It is common over wood subfloors and over slabs with minor cracking.
- A crack-isolation membrane over a concrete slab with existing cracks, so a hairline crack in the slab does not become a crack through a row of tile.
- A waterproofing membrane in showers, tub surrounds and wet areas. Tile is water-tolerant, but grout is porous. The membrane is what keeps water out of the structure. Our bathroom flooring guide covers where that matters most.
- Electric radiant heat mats, if you want a warm floor, embedded beneath the tile. That decision has to be made before installation, not after.
Large-format tile: stricter rules, better result
Large-format tile, meaning any tile with an edge 15 inches or longer under ANSI’s definition, is what most Vancouver remodels are asking for right now. 12x24 planks, 24x24 squares and 24x48 panels mean fewer grout lines and a calmer floor, and they make kitchens and bathrooms read larger. They are also far less forgiving to install.
Flatness. For tile with any edge 15 inches or longer, ANSI A108.02 tightens the substrate tolerance to 1/8 inch in 10 feet, with no more than 1/16 inch variation in any 24 inches. That is twice as flat as standard tile needs. Plenty of floors, including new construction, do not meet it as built, so self-leveling compound or grinding is a normal part of a large-format job. We check rather than assume.
Lippage. Lippage is the edge of one tile sitting proud of the edge next to it. On a large tile, a slight bow in the tile plus a slight dip in the floor add up to an edge you can see in low sunlight and catch with a sock. Tile leveling clip systems help hold neighboring edges in plane while the mortar cures.
Offset patterns. Long rectangular tiles have a slight natural bow along their length. A 50 percent brick-joint offset lines the high center of one tile up with the low ends of its neighbors and makes lippage worse. Industry guidance for tiles with a side longer than 18 inches is to keep the offset to no more than about a third of the length. If you have your heart set on a 50 percent offset, that is a conversation to have before the tile is ordered.
Mortar and coverage. Large tile needs a mortar rated for large and heavy tile, a bigger trowel notch, and usually back-buttering on the tile itself. ANSI calls for an average of at least 80 percent mortar contact in dry areas and 95 percent in wet areas, with edges and corners fully supported. A hollow corner is where a large tile cracks the first time someone drops a pan on it.
Handling. Big panels are heavy, flex when carried flat, and often take two people to set cleanly. It is slower per square foot, and it should be.
Done properly, the result is worth it: a floor that reads as one surface with far less grout to keep clean. Done carelessly, it is the most visible bad tile job there is.
Layout is decided before the first tile is set
Layout is where a tile floor looks designed or looks accidental.
- Start from the focal point. The grid is set from the most visible line in the room, usually the doorway, the vanity or the kitchen island, not from whichever wall is closest.
- No slivers. A good layout avoids thin cut pieces at a doorway or along a visible wall, even if it means shifting the whole grid.
- Direction. Plank-format tile usually runs the length of the room or along the main sightline.
- Transitions. The finished tile height against neighboring hardwood, vinyl or carpet is planned so thresholds sit properly and the dishwasher still slides out.
Grout and sealing
Grout is where tile floors show their age, so it deserves more than a glance at the color card.
Joint width. Tight joints look sleek, but ANSI calls for a grout joint no narrower than 1/16 inch, and wider when the tile’s own size variation requires it. Rectified porcelain, which is cut to precise dimensions, allows the narrowest joints.
Grout type. Sanded grout suits wider joints. Unsanded grout suits narrow joints and polished surfaces that sand would scratch. Epoxy grout is the one we recommend for kitchen floors and wet areas: it resists staining far better and does not need sealing, at a higher price.
Color. A mid-tone grout hides everyday life on a floor. Bright white grout on a kitchen floor will not stay bright white.
Sealing. Cement-based grout is porous and should be sealed once it cures. Natural stone needs sealing too, and periodic resealing.
The movement joint almost nobody mentions
Tile floors need soft joints: a flexible sealant rather than grout at the perimeter where tile meets walls, at changes of plane such as a tub or cabinet base, and at intervals across large open floors. Grouting tile tight to the walls is one of the most common reasons tiles tent, popping up in a ridge across the middle of a room, years later. It is especially common over concrete and in rooms with strong sun through large windows. It is a small detail, and it tells you the installer knows the standards.
How long a tile installation really takes
Tile cannot be rushed, because materials have to cure between steps.
- Prep: old floor removed, subfloor reinforced or flattened, backer board or membrane installed, heat mat laid if you chose one. Leveling compound needs to cure before tile goes over it.
- Setting: tile laid out and set in mortar. A bathroom floor is usually set in a day; a large kitchen takes longer.
- Grouting: once the mortar has set, typically the following day.
- Cure and seal: grout cures before sealing, and the floor should see only light foot traffic until then.
For a typical bathroom, that is one to two days of installation with cure time on top, so plan for the room to be out of use for several days. Kitchens, large-format tile and floors that need significant leveling take longer. Be skeptical of anyone promising a one-day tile floor. Our guide to what to expect on installation day covers the parts every flooring job shares.
Tile, or something that looks like tile?
Tile is the right answer for showers, bathrooms, mudrooms, entries that take the weather, and anywhere you want radiant heat. In a kitchen where you stand for hours, or over a subfloor that would need expensive reinforcement, luxury vinyl tile gives you the stone look with more give underfoot and a far simpler installation. We sell and install both, so we can tell you honestly which suits the room.
What drives the cost of a tile install
- Tile size and format: large-format and mosaic are slower to set than standard sizes
- Substrate work: reinforcement, leveling compound, backer board or membranes
- Waterproofing in wet areas
- Layout: diagonal, herringbone and patterned layouts mean more cutting and more waste
- Radiant heat
- Grout type: epoxy costs more than cement grout
- Tear-out, especially removing old tile, which is heavy, slow work
Our Vancouver flooring cost guide puts tile in context alongside the other materials.
See it, then get a real number
We carry porcelain, ceramic, natural stone and large-format tile from Dal Tile, Marazzi, Florida Tile and American Olean. See the range on our tile flooring page, or book a free in-home estimate and we will check the stiffness and flatness of your floor before we quote, so the number includes the work that actually makes tile last. We install tile throughout Clark County, including Camas, Battle Ground and Washougal. Call (360) 525-2962.
Related reading
Frequently asked questions
- How long does tile installation take?
- A typical bathroom floor takes one to two days of installation plus cure time, so plan for the room to be out of use for several days. Kitchens and large-format tile take longer because the substrate prep is more involved. Mortar has to set before grouting, and grout has to cure before sealing and normal use.
- What counts as large-format tile?
- Under the ANSI tile installation standards, any tile with at least one edge 15 inches or longer is large-format. That includes 12x24 planks, 24x24 squares and larger panels. These tiles need a flatter substrate, a mortar suited to large and heavy tile, and more careful setting than smaller sizes.
- Can tile be installed over a wood subfloor in an older Vancouver home?
- Yes, if the floor is stiff enough. Tile needs a subfloor that does not flex, and natural stone needs one roughly twice as stiff as porcelain. Older homes on crawlspaces sometimes need added plywood, blocking between joists, or an uncoupling membrane first. That gets assessed at the estimate, not discovered after the grout cracks.
- Why do tile floors crack?
- Almost always because of what is underneath: a subfloor that flexes, a slab crack that moves, tile grouted tight against the walls with no room to expand, or tile that was not fully bedded in mortar and has hollow spots. The tile itself is rarely the cause.